Audi Q5: Overview - Door
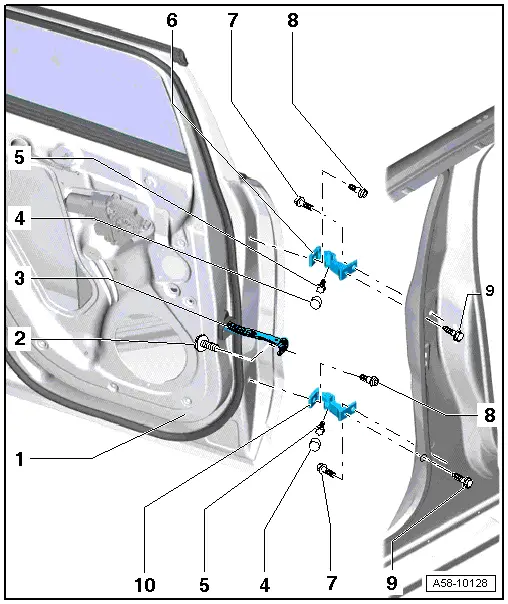
1 - Door
2 - Bolt
3 - Door Arrester
- Removing and installing. Refer to
→ Chapter "Door Arrester, Removing and Installing".
4 - Cap
5 - Stud Bolt
6 - Upper Door Hinge
7 - Bolt
8 - Bolt
 Note
Note
- The bolt is a fitting bolt so it is generally not necessary to
adjust the door using it.
- If it is necessary to make an adjustment using these bolts, the bolt
can be replaced with one of the same length and strength category.
9 - Bolt
10 - Lower Door Hinge
Overview - Door Arrester
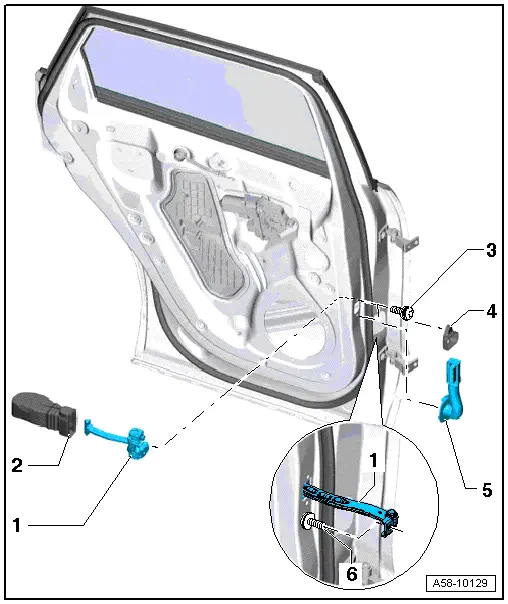
1 - Door Arrester
2 - Rubber Grommet
3 - Bolt
4 - Cover
5 - Grommet
6 - Bolt
READ NEXT:
Removing
- Disconnect the connector on the A-pillar. Refer to
→ Electrical Equipment; Rep. Gr.97; Connectors.
- Remove the door arrester bolt -2-.
- Remove the cover ca
Removing
- Move the door window into the "closed" position.
- Remove the door trim panel. Refer to
→ Body Interior; Rep. Gr.70; Rear Door Trim Panels; Rear Door
Trim Panel
1 - Door
2 - Window Regulator
Removing and installing. Refer to
→ Chapter "Window Regulator, Removing and Installing".
3 - Clip
4 - Door Window
Re
SEE MORE:
Overview - Front Side Airbag
1 - Front Side Airbag
Driver side with the Driver Thorax Airbag Igniter -N199-
Front passenger side with Front Passenger Thorax Airbag Igniter
-N200-
WARNING
Follow all Safety Precautions when working with pyrotechnic
components. Refer to
→&n
Description
Applies to vehicles: with Start-Stop-System
The Start-Stop-System can help increase fuel economy and reduce CO2
emissions.
In the Start-Stop-mode, the engine shuts off automatically when the vehicle is
stopped, such as at a traffic light. The ignition remains switched on during
this

