Audi Q5: Brake Pads, Removing and Installing
Special tools and workshop equipment required
- Vehicle Diagnostic Tester
- Torque Wrench 1331 5-50Nm -VAG1331-
- Torque Wrench 1331 Insert - Ring Wrench -VAG1331/3-
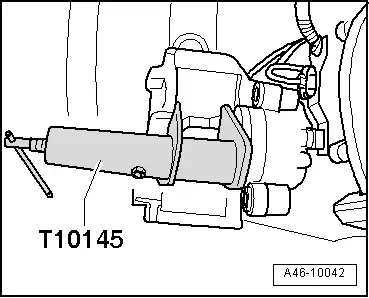
- Piston Resetting Tool -T10145-
 Note
Note
If old brake pads are being replaced with new ones, then it is necessary to check the brake rotor for wear. Pay attention to the brake rotor wear limit while doing this. Refer to → Chapter "Rear Brakes".
Removing
- The parking brake is released.
 Note
Note
- When removing, mark brake pads that will be used again. Install in the same position, otherwise braking effect will be uneven.
- Do not disconnect the connectors from the parking brake motors.
- If the brake pads are replaced, use the Vehicle Diagnostic Tester to press back the parking brake pistons.
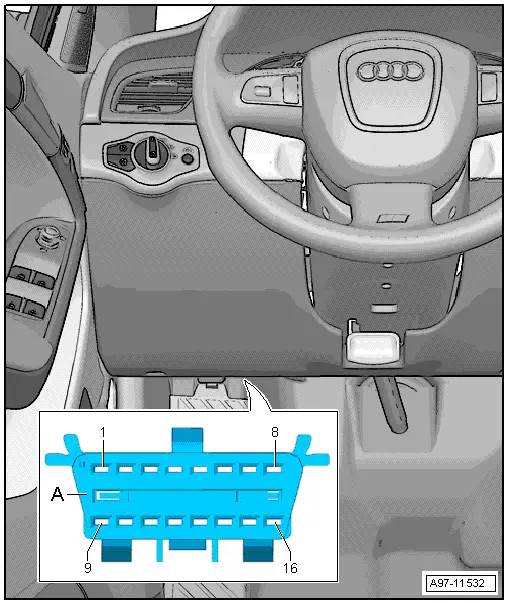
- Connect the Vehicle diagnostic tester to the diagnostic connection on the vehicle with the ignition switched off.
- Turn on the ignition.
- After entering the VIN, select Guided Functions.
- Drive back the parking brake motor:
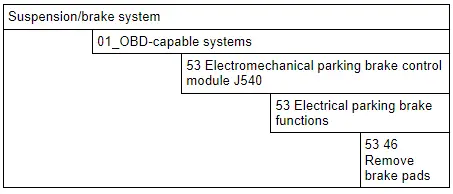
- Continue to follow the instructions in the vehicle diagnostic tester display.
- Remove affected rear wheel. Refer to →Wheel and Tire Guide; Rep. Gr.44.
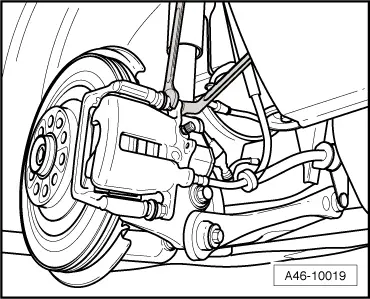
- Remove the brake hose and electrical wire from the bracket on the stub axle carrier
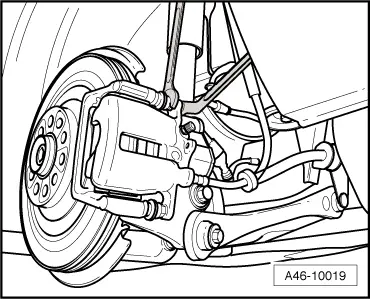
- Remove attachment bolts from brake caliper housing, counter-hold guide pins to do so.
- Remove the brake caliper.
 Caution
- Do not let the brake caliper with the brake carrier hang on the brake hose. Do not support the weight with the brake hose.
- Replace the brake hose if damaged.
- Do not actuate the brakes or the electromechanical parking brake when the brake caliper is removed.
- Remove the brake pads.
- Remove the brake pad retaining plate.
 Note
Note
- When using the Vehicle Diagnostic Tester to press back the pistons, the pressure nut drives back on the spindle.
- The piston must then be completely pressed back using the Piston Resetting Tool -T10145-
 Caution
Danger of contamination and paint damage from escaping brake fluid.
- If the brake pads are worn out and brake fluid is filled, the brake fluid may overflow if the pistons in the brake cylinder are pressed back.
- Check the brake fluid level before pressing back the pistons. If there is brake fluid up to the "MAX" mark, some brake fluid will need to be extracted.
- Use the Brake Charger/Bleeder Unit -VAS5234- to extract brake fluid from brake fluid reservoir.
- Use the Piston Resetting Tool -T10145- to completely press back the piston.
Do not tilt the brake piston when pressing it back.
Installing
If old brake pads are being replaced with new ones, then it is necessary to check the brake rotor for wear. Pay attention to the brake rotor wear limit while doing this.
- Check brake rotor.
 Note
Note
- Always replace brake pads on the same axle at the same time.
- Install complete repair kit. Refer to Parts Catalog.
- Install on one axle on brake pads from the same manufacturer and with the same quality.
- Use only mineral spirits or commercially available brake cleaner to clean the brake caliper.
- Clean brake caliper.
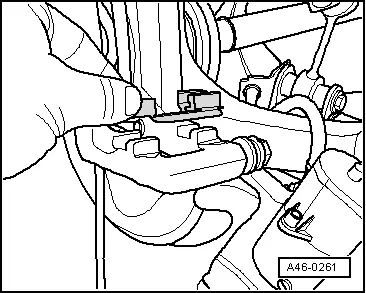
- Insert the brake pad retaining springs.
- Remove any protective film from the brake pad backing plate.
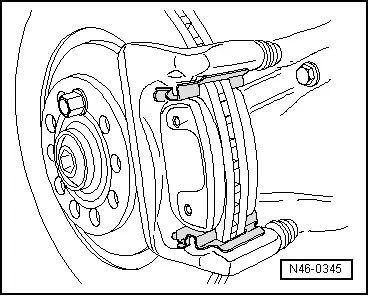
- Insert brake pads.
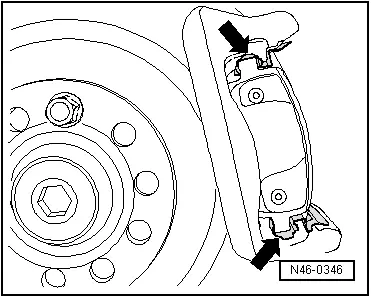
- Make sure that the brake pads are seated correctly in the retaining plates -arrows-.
 Note
Note
The brake pads must be seated between both securing tabs on the brake pad retaining plate to provide the air gap between the brake rotor and brake pad.
- Position the brake caliper.
- Secure brake caliper using new self-locking bolts.
To tighten the bolts, use the Torque Wrench 1331 5-50Nm -VAG1331- with Torque Wrench 1331 Insert - Ring Wrench -VAG1331/3-.
- Install the brake hose and electrical wire into the bracket on the stub axle carrier.
 Note
Note
Make sure the brake hose and wiring is correctly attached and secured inside the bracket on the stub axle carrier. This will prevent the hose and wiring from coming out of the bracket.
- Drive the parking brake motor out using the Vehicle Diagnostic Tester by following the directions on the display.
- Install the rear wheel. Refer to →Wheel and Tire Guide; Rep. Gr.44.
 WARNING
There is the risk of an accident.
- Before moving the vehicle, press the brake pedal firmly several times to seat the brake pads correctly in their operating position.
- Make sure the brakes are working correctly before driving the vehicle.
