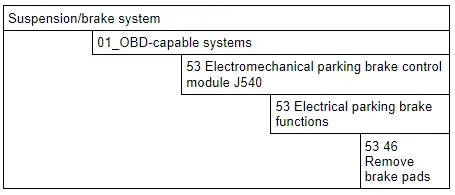
Audi Q5: Brake Caliper, Removing and Installing
Special tools and workshop equipment required
- Vehicle Diagnostic Tester
- Torque Wrench 1332 40-200Nm -VAG1332-
- Torque Wrench 1332 Insert - Reversible Ratchet -VAG1332/1-
- Pawl Adapter
Removing
- The parking brake is released.
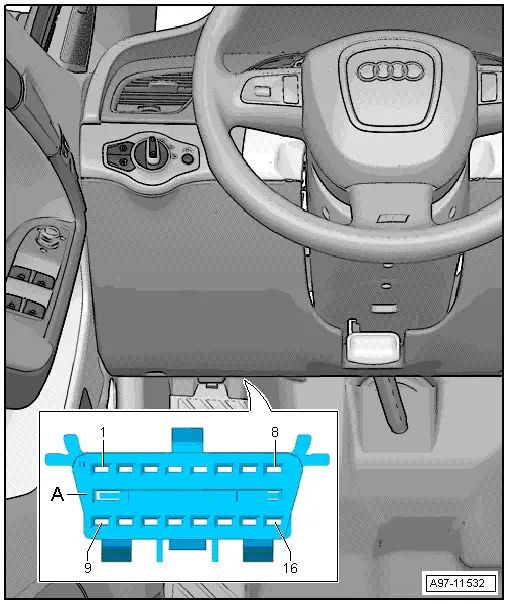
- Connect the Vehicle diagnostic tester to the diagnostic connection on the vehicle with the ignition switched off.
- Turn on the ignition.
- After entering the VIN, select Guided Functions.
- Drive back the parking brake motor:
- Continue to follow the instructions in the vehicle diagnostic tester display.

- Remove affected rear wheel. Refer to →Wheel and Tire Guide; Rep. Gr.44.
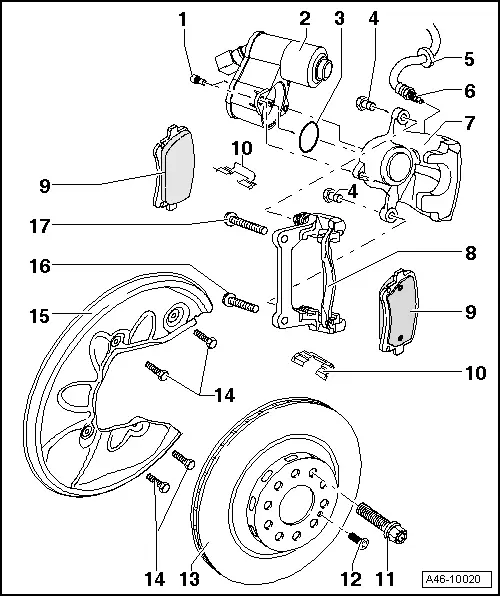
- Remove the brake hose -5- and electrical wire from the bracket on the stub axle carrier
- Remove bolts -16 and 17- from brake carrier.
- Remove the brake caliper with brake pads and the brake carrier.
 Caution
- Do not let the brake caliper with the brake carrier hang on the brake hose. Do not support the weight with the brake hose.
- Replace the brake hose if damaged.
- Do not actuate the brakes or the electromechanical parking brake when the brake caliper is removed.
Installing
 Note
Note
Use new bolts. Refer to Parts Catalog.
- Carefully press the brake caliper with the brake carrier and the installed brake pads over the brake rotor.
- Tighten the brake carrier with new bolts -16 and 17-.
 Note
Note
Use an extension to tighten the lower screw -16-. An extension is not needed to tight the upper screw -17-. Slightly move the wheel housing liner away.
- Install the brake hose and electrical wire into the bracket on the stub axle carrier.
 Note
Note
Make sure the brake hose and wiring is correctly attached and secured inside the bracket on the stub axle carrier. This will prevent the hose and wiring from coming out of the bracket.
- Drive the parking brake motor out using the Vehicle Diagnostic Tester by following the directions on the display.
- Install the rear wheel. Refer to →Wheel and Tire Guide; Rep. Gr.44.
 WARNING
There is the risk of an accident.
- Before moving the vehicle, press the brake pedal firmly several times to seat the brake pads correctly in their operating position.
- Make sure the brakes are working correctly before driving the vehicle.

