Audi Q5: Double cargo floor
You can store dirty or wet objects under the cargo floor.
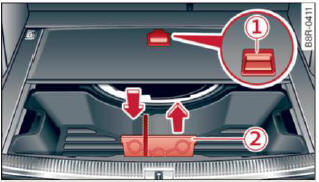
Fig. 78 Luggage compartment: cargo floor folded together
with protective tray
Folding the cargo floor together
- Lift the cargo floor by the handle > fig. 78 1 and fold it up.
- Place your item in the protective tray.
Removing the cargo floor, installing
- To remove, lift the cargo floor folded together and pull it toward the rear lid.
- To install, place the folded cargo floor into both retainers and unfold it.
Grab the protective tray on the handles and pull it out. You can also install a divider to divide 2 the storage area. Depending on the vehicle equipment level, the protective tray can have different sizes and shapes.
Cargo net and storage hooks
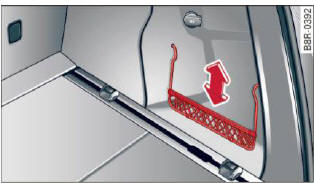
Fig. 79 Luggage compartment
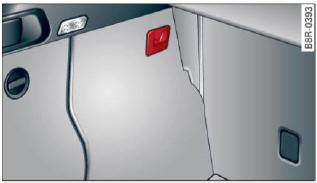
Fig. 80 Luggage compartment: Storage hooks
Storage net
The storage net on the right side trim can be moved lower on the side guides, if needed > fig. 79.
The roof rock can only be attached at the marked locations.
Storage hooks
The storage hooks can be used to secure shopping bags from falling over > fig. 80.
WARNING
Do not use the storage hooks to secure heavy objects. Heavier objects are not adequately secured. There is risk of personal injury.

