Audi Q5: Multifunction Steering Wheel, General Information
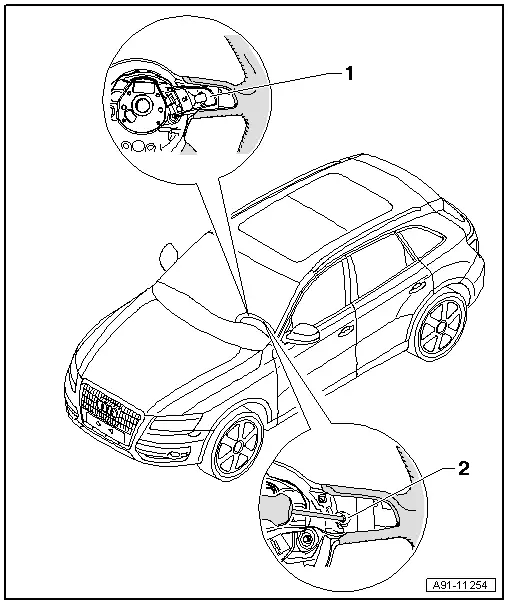
Buttons are integrated in the steering wheel for easier operation of Infotainment, telephone and the navigation system. On vehicles with Tiptronic, rocker switches are also installed on the left and right.
The Multifunction Steering Wheel Control Module -J453- (under the right button) reads out the button information and transfers them over the LIN bus to the Steering Column Electronics Control Module -J527-. From the Steering Column Electronics Control Module -J527-, the information is transferred to the individual components via the CAN Bus (comfort) and the Data Bus On Board Diagnostic Interface -J533-.
Perform the Fault Finding with the Vehicle Diagnostic Tester.
Overview - Multifunction Steering Wheel
Overview - Multifunction Steering Wheel, through MY 2012
1 - Multifunction Button
- Removing and installing. Refer to → Chapter "Multifunction Buttons, Removing and Installing, through MY 2012".
2 - Bolt
- 3 Nm
- Tiptronic Switch
- Removing and installing. Refer to → Chapter "Tiptronic Switch, Removing and Installing, through MY 2012".
Overview - Multifunction Steering Wheel, 4-Spoke Steering Wheel, from MY 2013
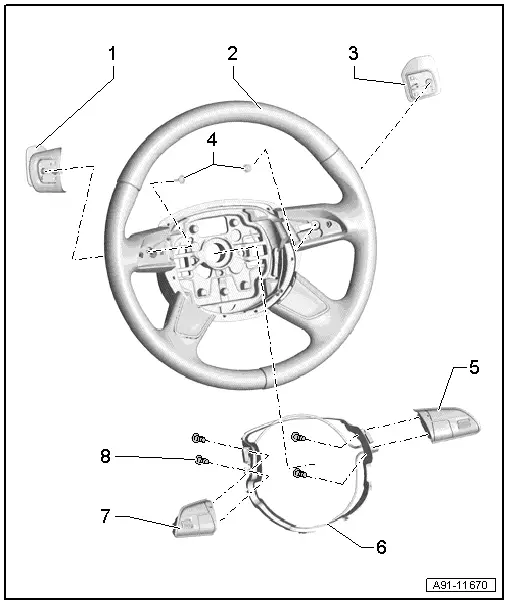
1 - Tiptronic Downshift Button on Steering Wheel -E439-
- Removing and installing. Refer to → Chapter "Tiptronic Switch, Removing and Installing, from MY 13".
2 - 4-Spoke Steering Wheel
3 - Tiptronic Upshift Button on Steering Wheel -E438-
- Removing and installing. Refer to → Chapter "Tiptronic Switch, Removing and Installing, from MY 13".
4 - Bolt
- 1.2 Nm
5 - Right Multifunction Buttons On Steering Wheel -E441-
- Removing and installing. Refer to → Chapter "Multifunction 4-Spoke Steering Wheel, Removing and Installing, from MY 2013".
6 - Trim Molding
7 - Left Multifunction Buttons On Steering Wheel -E440-
- Removing and installing. Refer to → Chapter "Multifunction 4-Spoke Steering Wheel, Removing and Installing, from MY 2013".
8 - Bolt
- 1.2 Nm
Overview - Multifunction Steering Wheel, 3-Spoke Steering Wheel, from MY 2013
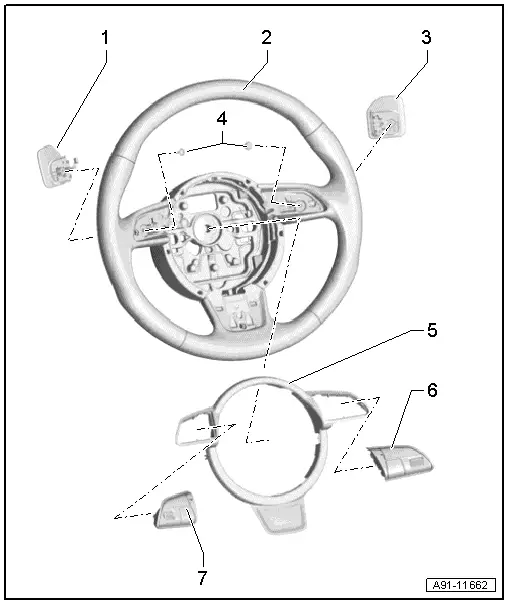
1 - Tiptronic Downshift Button on Steering Wheel -E439-
- Removing and installing. Refer to → Chapter "Tiptronic Switch, Removing and Installing, from MY 13".
2 - 3-Spoke Steering Wheel
3 - Tiptronic Upshift Button on Steering Wheel -E438-
- Removing and installing. Refer to → Chapter "Tiptronic Switch, Removing and Installing, from MY 13".
4 - Bolt
- 1.2 Nm
5 - Trim Molding
6 - Right Multifunction Buttons On Steering Wheel -E441-
- Removing and installing. Refer to → Chapter "3-Spoke Steering Wheel Multifunction Buttons, Removing and Installing, from MY 2013".
7 - Left Multifunction Buttons On Steering Wheel -E440-
- Removing and installing. Refer to → Chapter "3-Spoke Steering Wheel Multifunction Buttons, Removing and Installing, from MY 2013".

