Audi Q5: Overview - Door
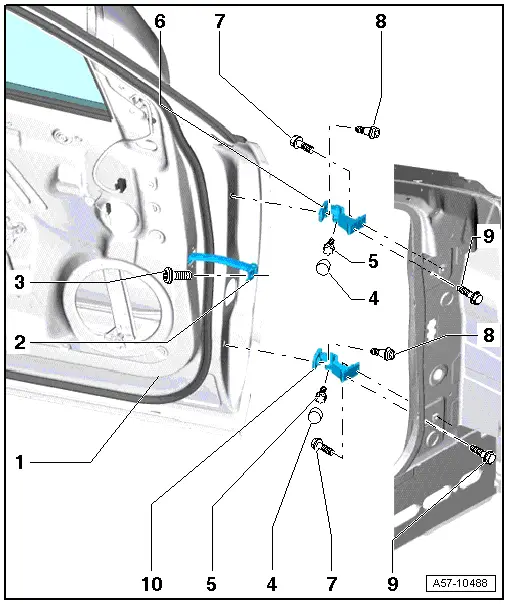
1 - Door
- Remove the door trim panel. Refer to
→ Body Interior; Rep. Gr.70; Front Door Trim Panels; Front Door Trim
Panel, Removing and Installing.
2 - Door Arrester
3 - Bolt
4 - Cap
5 - Stud Bolt
6 - Upper Door Hinge
7 - Bolt
8 - Bolt
 Note
Note
- The bolt is a fitting bolt so it is generally not necessary to
adjust the door using it.
- If it is necessary to make an adjustment using these bolts, the bolt
can be replaced with one of the same length and strength category.
9 - Bolt
10 - Lower Door Hinge
Overview - Door Arrester
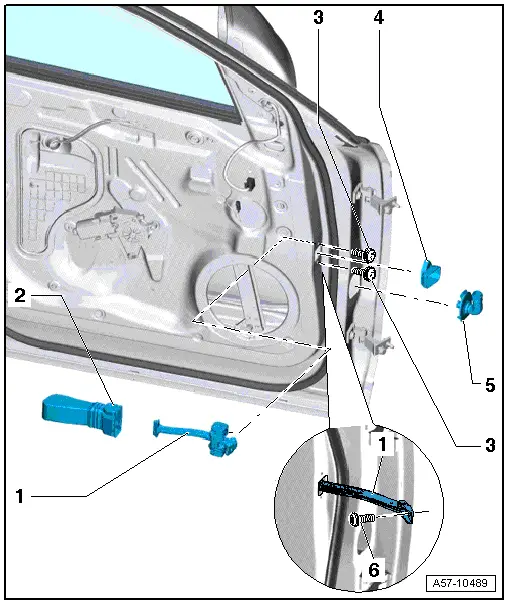
1 - Door Arrester
2 - Rubber Grommet
3 - Bolt
4 - Cover
5 - Grommet
6 - Bolt
READ NEXT:
Removing
- Disconnect the connector on the A-pillar. Refer to
→ Electrical Equipment; Rep. Gr.97; Connectors.
- Remove the door arrester bolt -2-.
- Remove the cover ca
Removing
- Move the door window into the "closed" position.
- Remove the door trim panel. Refer to
→ Body Interior; Rep. Gr.70; Front Door Trim Panels; Front Door
Trim Pan
1 - Door
- Remove the door trim panel. Refer to
→ Body Interior; Rep. Gr.70; Front Door Trim Panels; Front Door Trim
Panel, Removing and Installing.
2 - Wi
SEE MORE:
Activating or deactivating the compass
Applies to vehicles: with digital compass
The direction is displayed on the interior rear
view mirror.
Fig. 62 Inside rear view mirror: digital compass activated
To activate or deactivate, hold the (A) button
down until the red display appears or disappears
Special tools and workshop equipment
required
Counterhold - Kit - Multiple Use -T10172- with Counterhold -
Kit - Adapter 5 - T10172/5-
Socket - Xzn 12 -T40154-
Engine and Gearbox Jack -VAS6931- with Universal
Transmission Support -VAG1359/2-
Removal
Pay attention to the general repair inform

