Audi Q5: Overview - Sill and Tunnel Side Trim
Audi Q5 Type 8R (2008 - 2017) Service Manual / Body / Body Interior / Seat Frames / Overview - Sill and Tunnel Side Trim
Overview - Sill and Tunnel Side Trim, Standard Seat, Comfort Seat, Sport Seat
Sill Panel Trim
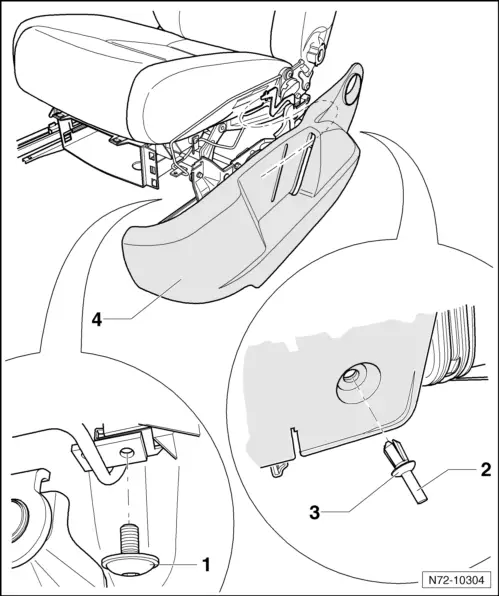
1 - Bolt
- 8 Nm
2 - Clamping Pin
3 - Expanding Clip
4 - Seat Side Sill Panel Trim
- Can be replaced with seat installed
- Removing and installing. Refer to → Chapter "Sill Side Trim, Removing and Installing, Standard/Sport Manual Seats".
Sill Panel Trim Bracket Version 1
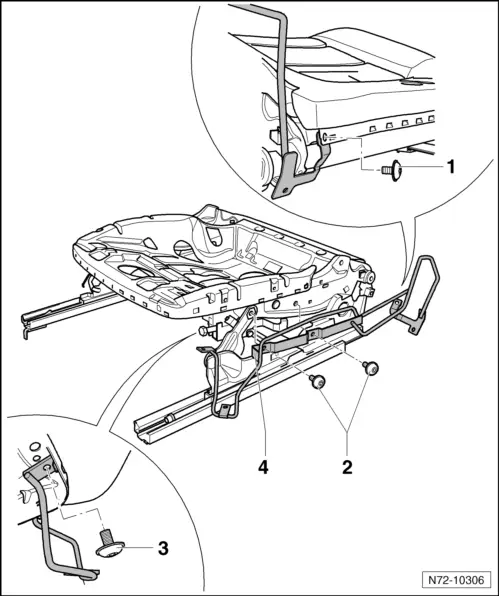
1 - Bolt
- 8 Nm
2 - Bolts
- 8 Nm
3 - Bolt
- 8 Nm
4 - Retaining Bracket
- For seat side sill panel trim
- Removing and installing. Refer to → Chapter "Sill Side Trim, Removing and Installing, Standard/Sport Manual Seats".
Seat Side Sill Panel Trim Bracket Version 2
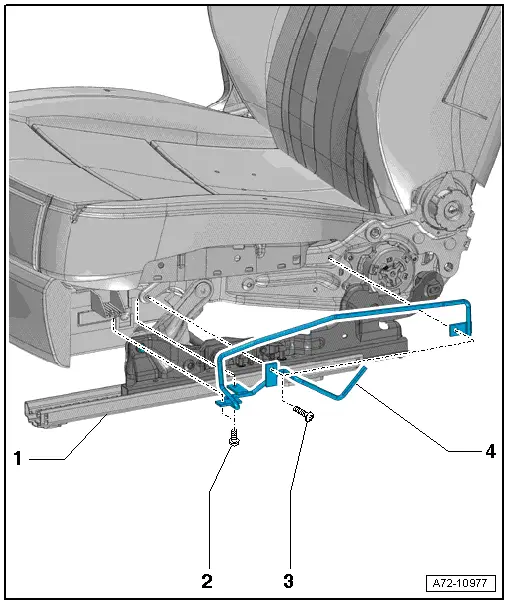
1 - Front Seat
- Manual
2 - Bolt
- 8 Nm
- Quantity: 2
3 - Bolt
- 8 Nm
- Quantity: 2
4 - Retaining Bracket
- For seat side sill panel trim
- Removing and installing. Refer to → Chapter "Sill Side Trim, Removing and Installing, Standard/Sport Manual Seats".
Seat Side Trim on the Tunnel Side
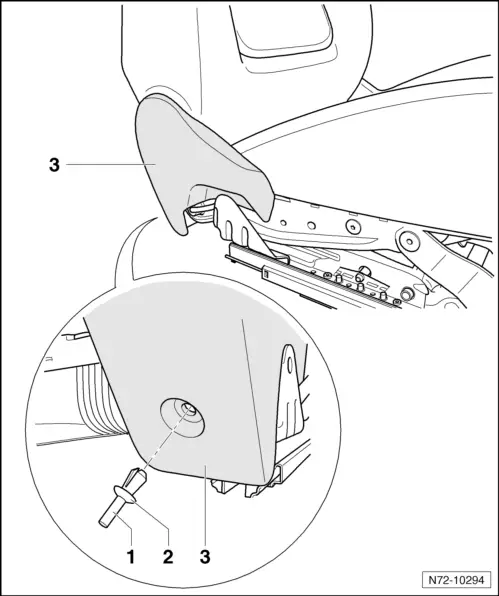
1 - Clamping Pin
2 - Expanding Clip
3 - Seat Side Trim on the Tunnel Side
- Can be replaced only with the seat removed
- Removing and installing. Refer to → Chapter "Trim, Removing and Installing, Tunnel-Side".
Overview - Sill and Tunnel Side Trim, Front Passenger Side Folding Seat
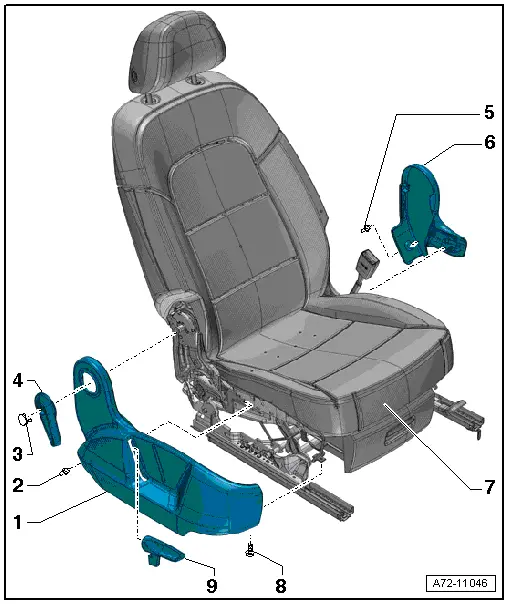
1 - Seat Side Sill Panel Trim
- Can be replaced with seat installed
- Removing and installing. Refer to → Chapter "Sill-Side Trim, Removing and Installing, Front Passenger Side Folding Seat".
2 - Expanding Clip
3 - Cap
4 - Release Handle
- For the backrest
- Removing and installing. Refer to → Chapter "Backrest Release, Removing and Installing".
5 - Expanding Clip
6 - Seat Side Trim on the Tunnel Side
- Can be replaced only with the seat removed
- Removing and installing. Refer to → Chapter "Trim, Removing and Installing, Tunnel-Side".
7 - Front Folding Seat
- Passenger seat only
8 - Bolt
- 8 Nm
9 - Seat Height Adjustment Handle
- Removing and installing. Refer to → Chapter "Seat Height Adjuster, Removing and Installing".

