Audi Q5: Attachments, Removing and Installing
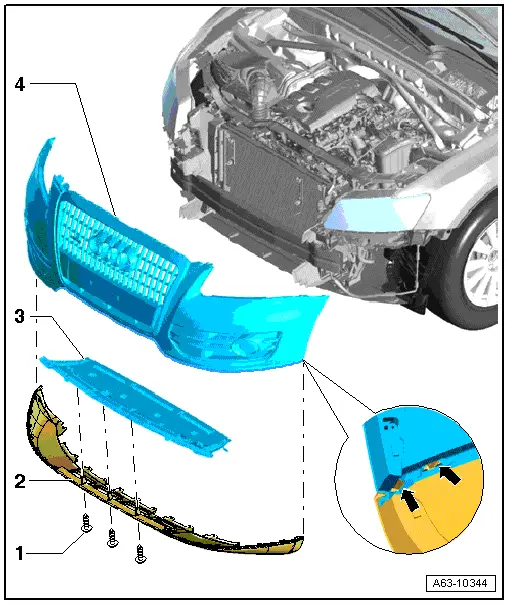
Front Spoiler
Removing
- Remove the front bumper cover. Refer to → Chapter "Bumper Cover, Removing and Installing".
- Remove the bolts -1- and the end plate.

- Remove the bolts -1 and 3-, if equipped.
- Open the retainers -arrows- and remove the connecting piece -2-.
- Open the retainers -arrows- on the spoiler at the bumper -4- and at the bottom of the radiator grille in stages and then remove the spoiler.
Installing
Install in reverse order of removal. Note the following:
- Install the front bumper cover. Refer to → Chapter "Bumper Cover, Removing and Installing".
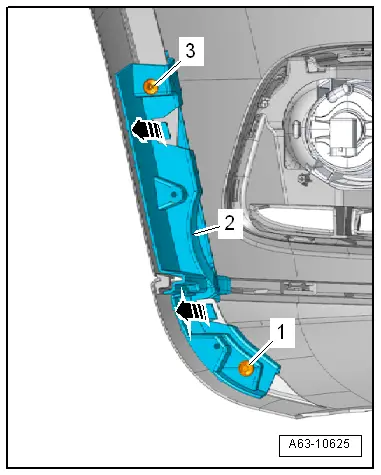
Molded Foam Piece
Removing
- Remove the front bumper cover. Refer to → Chapter "Bumper Cover, Removing and Installing".
- Audi Q5 S-Line/SQ5, free up the wiring harness.
- Guide the molded foam piece -2- at the top out of the bracket -arrow- and at the bottom out of the holder -1-.
Installing
Install in reverse order of removal. Note the following:
- Install the front bumper cover. Refer to → Chapter "Bumper Cover, Removing and Installing".
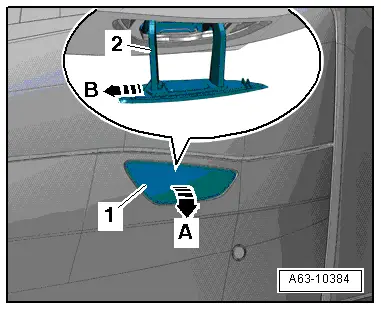
Headlamp Washer System Spray Nozzle Cover
Removing
- Fold the washer nozzle cover -1- upward -arrow A-.
- Pry off the spray nozzle cover using a screwdriver on the inner side -2- and disengage it at the opposite side -arrow B-.
Installing
Install in reverse order of removal. Note the following:
- Press the spray nozzle cover on until it engages audibly.