Audi Q5: Component Location Overview - Seals
Audi Q5 Type 8R (2008 - 2017) Service Manual / Transmission / Real Final Drive, Differential / Seals / Component Location Overview - Seals
Seals Component Location Overview, 0BC, 0BD
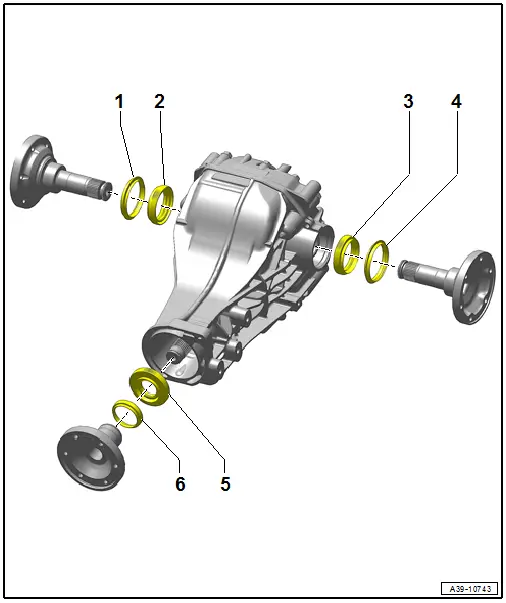
1 - Right Ring
- Replacing. Refer to → Chapter "Flange Shaft Protective Ring, Replacing".
2 - Right Seal
- Replacing. Refer to → Chapter "Right Seal, Replacing".
3 - Left Seal
- Replacing. Refer to → Chapter "Left Seal, Replacing".
4 - Left Ring
- Replacing. Refer to → Chapter "Flange Shaft Protective Ring, Replacing".
5 - Input Shaft Seal
- Replacing. Refer to → Chapter "Input Shaft Seal, Replacing".
6 - Input Shaft Ring
- Replacing. Refer to → Chapter "Flange Input Shaft Ring, Replacing".
Seals Component Location Overview, 0BE, 0BF
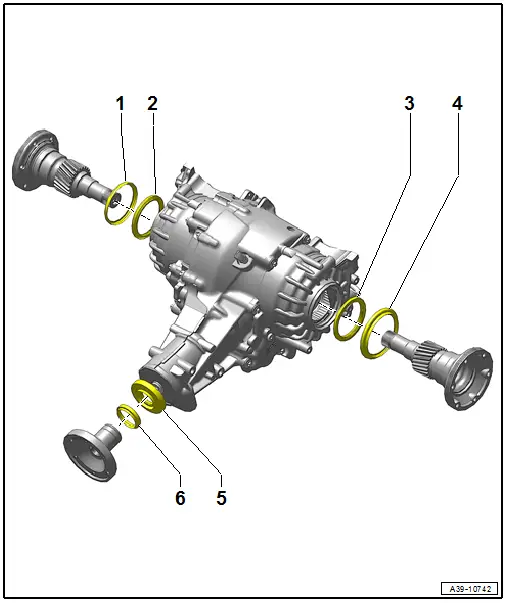
1 - Right Ring
- Replacing. Refer to → Chapter "Flange Shaft Ring, Replacing, 0BE, 0BF".
2 - Right Seal
- Replacing. Refer to → Chapter "Right Seal, Replacing".
3 - Left Seal
- Replacing. Refer to → Chapter "Left Seal, Replacing, 0BE, 0BF".
4 - Left Ring
- Replacing. Refer to → Chapter "Flange Shaft Ring, Replacing, 0BE, 0BF".
5 - Input Shaft Seal
- Replacing. Refer to → Chapter "Input Shaft Seal, Replacing".
6 - Input Shaft Ring
- Replacing. Refer to → Chapter "Flange Input Shaft Ring, Replacing, 0BE, 0BF".

