Audi Q5: Lock Carrier Cover, Removing and Installing
Removing
Version 1:
- Remove the clamping pins from the expanding clips -2-.
- Remove the expanding clips.
- Lift the lock carrier cover -1- and pull it off the radiator grille -4-.

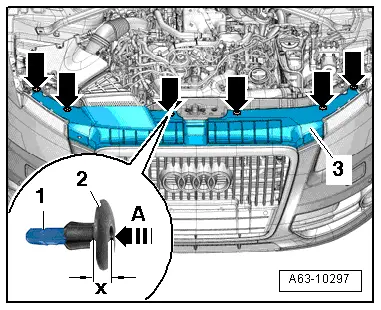
Version 2:
- To remove the expanding clips -arrows-, push the clamping pin -1- carefully to dimension -x- until it clicks into the expanding clip -arrow A-.
- Dimension -x- = 5 mm
- Pull out unlocked expanding clip -2- with the clamping pin.
- Lift the lock carrier cover -3- and disengage it from the radiator grille.
Installing
Install in reverse order of removal.
Front Bumper Cover, Removing and Installing
Removing
- Remove the lock carrier cover. Refer to → Chapter "Lock Carrier Cover, Removing and Installing".
- Remove the bolt -2-.
- Disconnect the connector -1-.
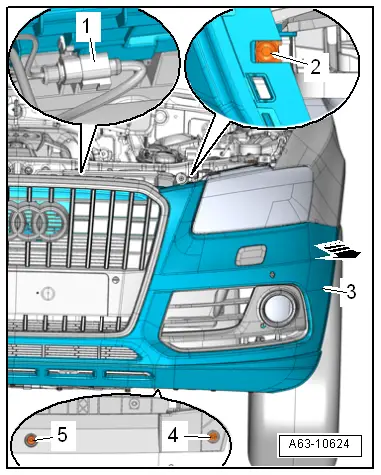
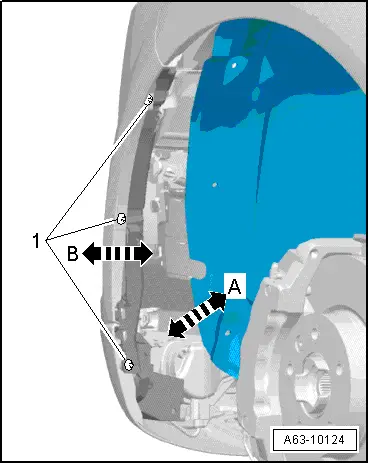
- Remove the bolts -1- and push the wheel housing liner to the side.
- Disconnect the connector from the fog lamp.
- Remove the bolts -4 and 5-.
- Disengage the side bolster -3- on the front side panel -arrow- and have a 2nd technician help to pull the bumper cover forward.
- Remove the bumper cover.
Installing
Install in reverse order of removal. Note the following:
- Install the lock carrier cover. Refer to → Chapter "Lock Carrier Cover, Removing and Installing".
- If the vehicle has adaptive cruise control (ACC), the ACC must be recalibrated. Refer to → Suspension, Wheels, Steering; Rep. Gr.44; Adaptive Cruise Control (ACC); Adaptive Cruise Control (ACC), Calibrating.

Front Bumper Cover, Adjusting
- Remove the lock carrier cover. Refer to → Chapter "Lock Carrier Cover, Removing and Installing".
- If the gap dimension is not even, loosen the adjusting screw -2-, adjust the cover and radiator grille -1- and then tighten the screw.
- Check the gap dimension again and repeat the adjustment if necessary.

Front Bumper Guides, Removing and Installing
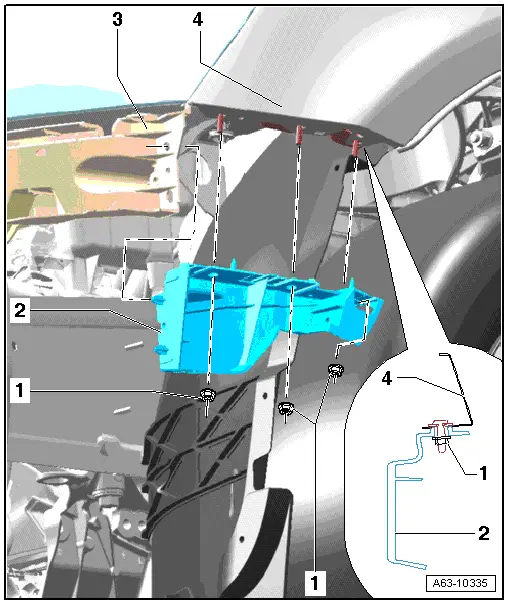
Removing
- Remove the front bumper cover. Refer to → Chapter "Bumper Cover, Removing and Installing".
- Remove the headlamp housing. Refer to → Electrical Equipment; Rep. Gr.94; Headlamps; Headlamp, Removing and Installing.
- Remove the nuts -1-.
- Remove the mount -2- from the fender -4-.
 Note
Note
Ignore -item 3-.
Installing
Install in reverse order of removal. Note the following:
- Install the headlamp housing. Refer to → Electrical Equipment; Rep. Gr.94; Headlamps; Headlamp, Removing and Installing.