Audi Q5: Repairing a Wire 0.35 mm 2 or Greater with Individual Crimp Connector
Procedure
- Free up the wire to be repaired approximately 20 cm on both sides of the repair point.
 Caution
Risk of damaging the electrical wires.
Expose wrapped wiring harnesses carefully.
- If necessary, removing the wiring harness wrapping using a knife.
- Cut out the damaged section of wire using the Wiring Harness Repair Set - Wire Strippers -VAS1978/3-.
 Note
Note
If, by cutting out the damaged wire section, both ends of the vehicle-specific single wire are too short for a repair using a single crimp connector, insert a repair wire section of matching length with two crimp connections. Refer to → Chapter "Repair a wiring 0.35 mm 2 or greater with intermediate wire section".
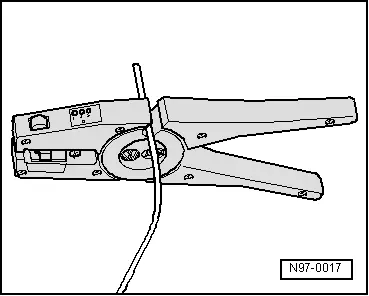
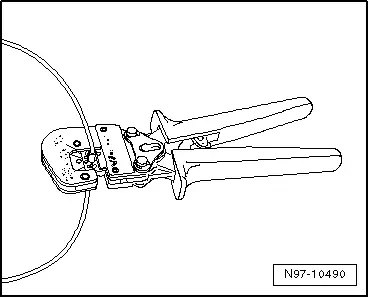
- Adjust the sliding stop in the Wiring Harness Repair Set - Wire Strippers -VAS1978/3- pliers jaws to 6 to 7 mm for the wire to be stripped.
- Insert wire end from front up to stop into jaws of pliers and squeeze the pliers completely.
- Open pliers again and remove the stripped wire end.
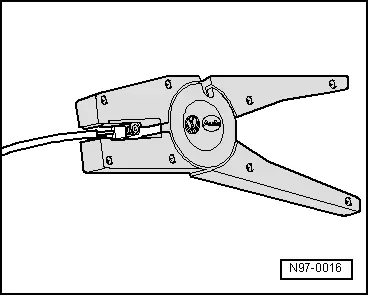
- For the repair, use a suitable crimp connector from the Wiring Harness Repair Set -VAS1978B-.
 Note
Note
- Always be sure to use the corresponding crimp connector and the correct crimping slot for the crimping connection used. Refer to → Chapter "Crimping Pliers with Insert".
- Do not crimp wire insulation.
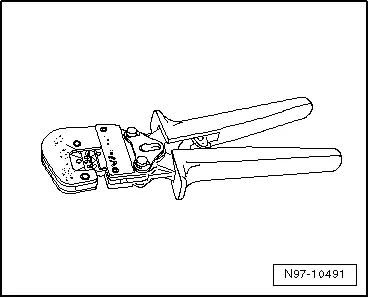
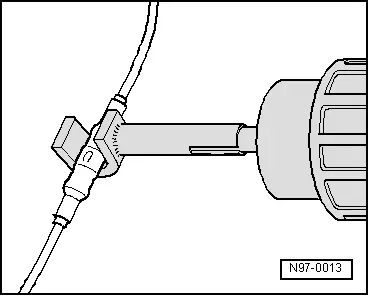
- Use the Wiring Harness Repair - Crimping Plier - Base Tool -VAS1978/1-2- to press the crimp connector.
The following exchangeable heads are available for the Wiring Harness Repair - Crimping Plier - Base Tool -VAS1978/1-2-:
- Wiring Harness Repair - Crimping Head - .35-2.5mm -VAS1978/1-1-
- Wiring Harness Repair Set - Crimping Head - 4-6mm -VAS1978/2 A-
- Slide crimp connection onto both stripped wire ends of vehicle-specific single wire and crimp them using crimp pliers.
 Note
Note
Do not crimp wire insulation.
After crimping, crimp connections must be heat-shrunk using hot air gun to prevent moisture penetration.
- Insert the Wiring Harness Repair - Blower - Shrink Element -VAS1978/15A- on the Wiring Harness Repair Set - Hot Air Blower -VAS1978/14A-.
 Caution
Risk of damaging surrounding components.
- When heat-shrinking crimp connections, be careful not to damage any other wiring, plastic parts or insulating material with the hot nozzle of the hot air blower.
- Always observe operating instructions of heat gun.
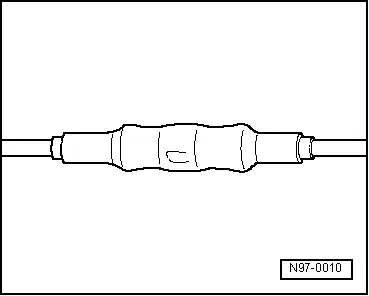
- Heat crimp connection using the hot air blower lengthwise from center outward until it is sealed completely and adhesive comes out the ends.
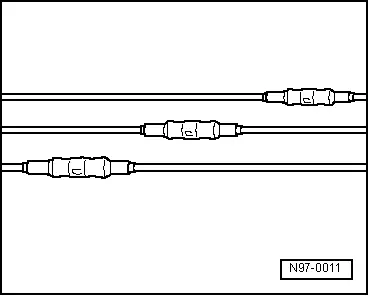
- This is how the completed repair location with individual crimp connector should appear.
 Note
Note
- Make sure that crimp connections do not lie directly next to each other when several wires need to be repaired. Arrange the crimp connectors at a slight offset so that the circumference of the wiring harness does not become too large.
- If the repair point was previous taped, this point must be taped again with yellow insulating tape after repairs.
- Secure the repaired wiring harness if necessary with a cable tie to prevent flapping noises while driving.