Audi Q5: Spring Tensioning System -VAS6274-, Converting
Special tools and workshop equipment required
- Spring Tensioning System -VAS6274-
- Spring Tensioning System - Audi Set -VAS6274/10-
- Spring Tensioning System - Q5 Set -VAS6274/11-
 Note
Note
It must only be converted once. It is not necessary to convert back again.
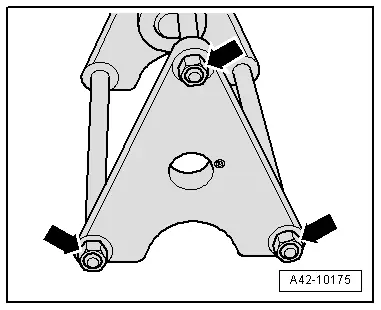
- Remove the tensioning system nuts -arrows- (quantity: six).
- Remove the plate and remove the rods from the tensioning system.

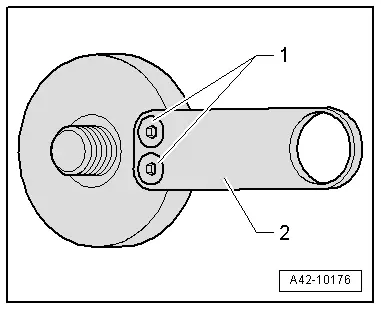
- Remove the bolt -arrow- and the previous spring plate -1- with the hole -2- without the counter-bore.

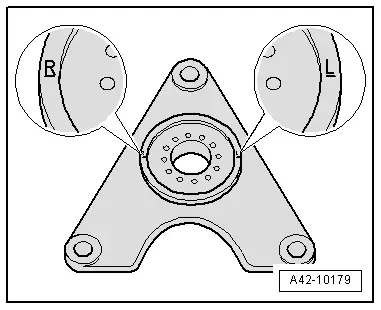
- Insert the new plate with the threaded holes supplied with the Spring Tensioning System - Audi Set -VAS6274/10- into the plate so that the "R" and "L" are horizontal.
- Tighten the new bolt -arrow- supplied with the plate from the Spring Tensioning System - Audi Set -VAS6274/10-. Do not rotate the plate.
- Insert the new spring plate -1- with the hole -3- with the counter-bore from the Spring Tensioning System - Audi Set -VAS6274/10-.
- Insert the new spring plate -1- so the stop -2- aligns with the marking "L".
- Tighten the new spring plate -1- with the new bolt from the Spring Tensioning System - Audi Set -VAS6274/10-.
- Remove the spring plate at the hydraulic cylinder.

- Remove the tab -2- and replace with the new tab from the Spring Tensioning System - Audi Set -VAS6274/10-.
- Tighten the new tab -2- with the new bolts -1- from the Spring Tensioning System - Audi Set -VAS6274/10-.
- Install the spring plate lightly as far as the stop on the tensioning system and then rotate it back again slightly.
- Position the Spring Tensioning System - Q5 Set - Suspension Strut Mounting -VAS6274/11-3- on the spring plate.
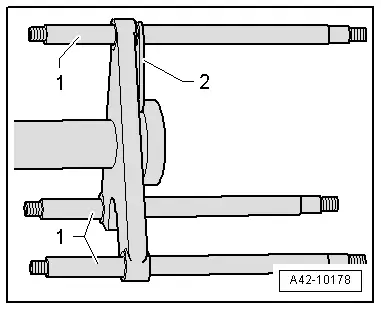
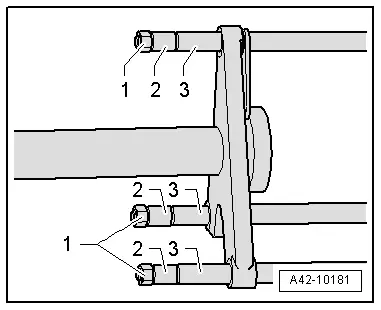
- Insert the rods from the Spring Tensioning System - Audi Set -VAS6274/10- with the long taper -1- into the tensioning system plate.
- Insert the upper rod in the tab -2-.
- Position the plate on the rods.
- Install the sleeves -2- and -3- from the Spring Tensioning System - Audi Set -VAS6274/10- and install the nuts -1- lightly.
- Position the tensioning system on a level surface and tighten the nuts -arrows-.