Audi Q5: Drive Axle Threaded Connection, Loosening and Tightening
Special tools and workshop equipment required
- Digital Torque Wrench -VAG1756A-
Loosen the threaded connection between the drive axle and wheel hub
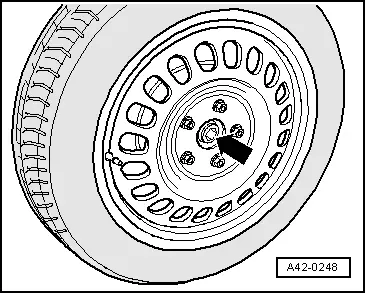
- With vehicle still standing on its wheels, loosen bolt a maximum of 90º, otherwise wheel bearing will be pre-damaged.
- Lift the vehicle just enough so that the wheels are hanging free.
- Operate brake (second mechanic required).
- Remove the bolt -arrow-.
Tighten the threaded connection between the drive axle and wheel hub
- Replace bolt -arrow-.
 Note
Note
- Before installing, clean the threads in the CV joint with a tap.
- Wheels must not yet touch the ground to tighten the drive axle, wheel bearing may otherwise be damaged.
- Operate brake (second mechanic required).
- Tighten bolt to 200 Nm.
- Lower the vehicle onto its wheels.
- Tighten bolt an additional 180º.

Drive Axle, Removing and Installing
Special tools and workshop equipment required
- Torque Wrench 1332 40-200Nm -VAG1332-
- Torque Wrench 80-400Nm -VAG1576-
Removing
- Loosen the connection between the drive axle and wheel hub. Refer to → Chapter "Drive Axle Threaded Connection, Loosening and Tightening".
- Remove the wheel.
- Remove the nuts -1- and the cover -2-.
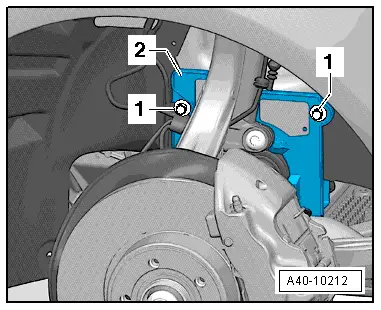
- Remove the bolts -arrows- from the flange shaft/transmission.
- Remove the drive axle.

Applies to a vehicle with a subframe shield
If there is not enough room available to remove the drive axle, perform the following steps:
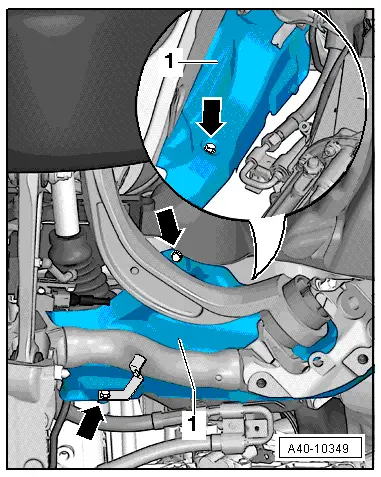
- Remove the bolts -arrows- and move the subframe shield -1- to the side.
- Remove the bracket for the brake hose and ABS line from the wheel bearing housing.
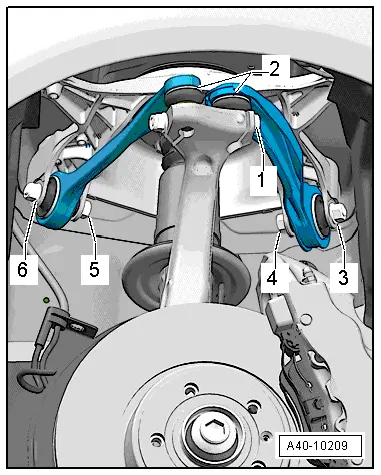
- Loosen the threaded connection -1- and remove both control arms -2- upward.
The slits in the wheel bearing housing must not be widened using a chisel or similar tool!
- Tilt the wheel bearing housing to the side while pulling the drive axle pins out of the wheel hub.
- Remove the drive axle.
Installing
Install in reverse order of removal. Note the following:
- Insert both of upper control arm joint pins -2- in the wheel bearing housing and insert the bolt -1-.
 Note
Note
Push the upper control arms down as far as possible while tightening the bolts!
- Tighten the bolting -1-.
Tightening specifications. Refer to → Chapter "Overview - Wheel Bearing".
- Tightening specifications. Refer to → Chapter "Overview - Subframe".
- Tightening specification for drive axle to flange shaft/transmission → Chapter "Overview - Wheel Bearing".
- Install the wheel.
- Tighten the wheel. Refer to → Chapter "Wheel Bolt Tightening Specifications".
- Tighten the drive axle to wheel hub threaded connection. Refer to → Chapter "Drive Axle Threaded Connection, Loosening and Tightening".


