Audi Q5: Gap Cover, Removing and Installing
Gap Cover, Removing and Installing, Vehicles without a Retaining Track
Removing
- Remove the front luggage compartment floor. Refer to → Chapter "Luggage Compartment Floor, Removing and Installing, Non-Hybrid Vehicles".
- Remove the dirt shield, if applicable.
- Remove the tie-downs. Refer to → Chapter "Tie Down, Removing and Installing".
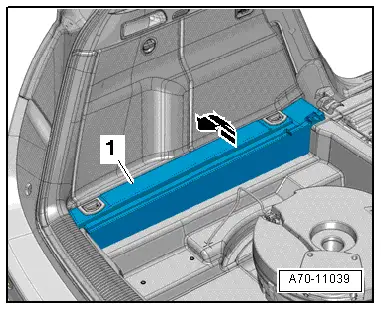
- Move the front gap cover -1- to the rear -arrow-, disengage it and remove.
Installing
Install in reverse order of removal.
Gap Cover, Removing and Installing, Vehicles with a Retaining Track
Removing
- Remove the front luggage compartment floor. Refer to → Chapter "Luggage Compartment Floor, Removing and Installing, Non-Hybrid Vehicles".
- Remove the dirt shield, if applicable.
- Remove the retaining track. Refer to → Chapter "Rail, Removing and Installing".
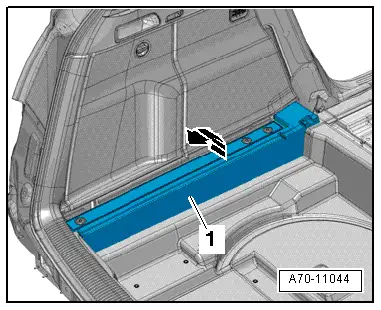
- Move the front gap cover -1- to the rear -arrow-, disengage it and remove.
Installing
Install in reverse order of removal.
Rail, Removing and Installing
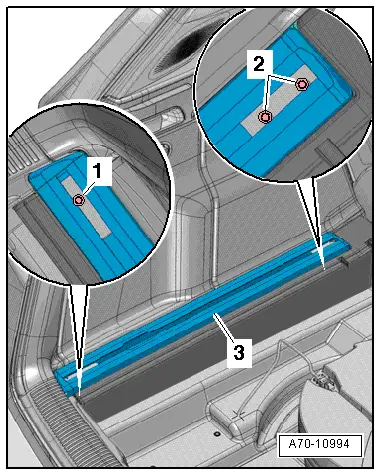
Removing
- Remove the rear luggage compartment floor.
- Remove the bolts -1 and 2- and the rail -3-.
Installing
Install in reverse order of removal.
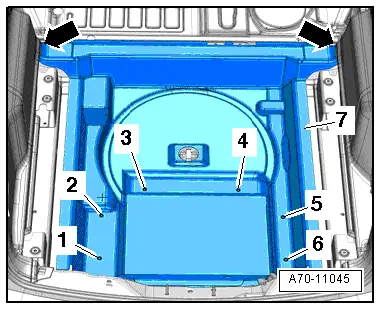
Spare Wheel Well Trim, Removing and Installing
Special tools and workshop equipment required
- Pry Lever -80 - 200-
Removing
- Remove the gap cover. Refer to → Chapter "Gap Cover, Removing and Installing".
- Remove the rear cross panel trim. Refer to → Chapter "Lock Carrier Trim, Removing and Installing, Non-Hybrid Vehicles".
- If equipped, remove the subwoofer. Refer to → Communication; Rep. Gr.91; Sound System; Subwoofer R211, Removing and Installing.
- Remove the clips -1 to 6- with the Pry Lever -80 - 200-.
- Remove the trim panel -7- for the spare wheel well under the luggage compartment side trim panels -arrows-.
Installing
Install in reverse order of removal. Note the following:
- Install the trim panel -7- for the spare wheel well under the luggage compartment side trim panels -arrows-.
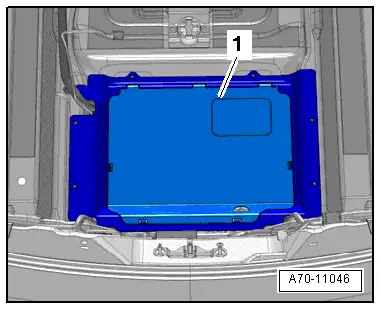
Battery Recess Cover, Removing and Installing
Removing
- Remove the spare wheel well trim panel. Refer to → Chapter "Spare Wheel Well Trim, Removing and Installing".
- Remove the battery recess cover -1-.
Installing
Install in reverse order of removal.
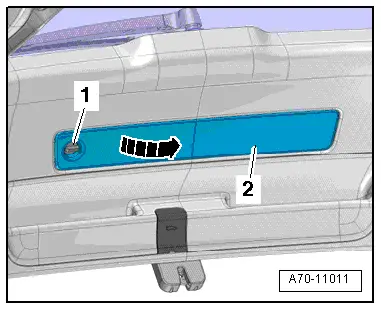
Emergency Triangle Cover, Removing and Installing
Removing
- Turn the quick release -1- 90º counter-clockwise, unclip the cover -2- from the lower trim panel and move it in -direction of arrow-.
- Disengage the cover on the lower trim and remove it.
- Remove the warning triangle from its mount.
Installing
- Install the emergency triangle cover -2-, press on it until it audibly latches and then turn the quick release -1- 90º clockwise.
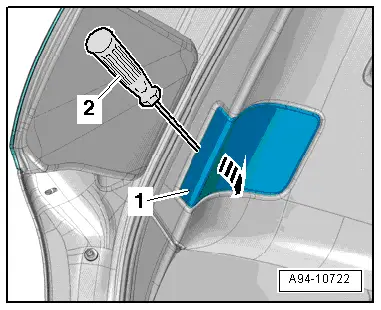
Tail Lamp Cover, Removing and Installing
Special tools and workshop equipment required
- Trim Removal Wedge -3409-
Removing
- Place the Trim Removal Wedge -3409- or a screwdriver -2- on the opening and pry off the cap -1- in direction of -arrow-.
Installing
- Press the cap on until it engages audibly.
Rear Lid Lock Trim, Removing and Installing
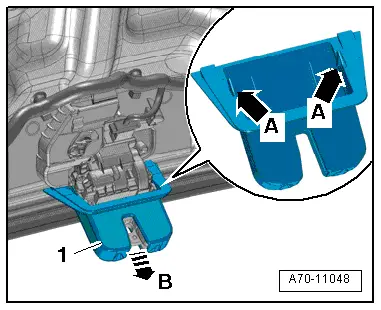
Removing
- Remove the lower rear lid trim panel. Refer to → Chapter "Lower Rear Lid Trim Panel, Removing and Installing".
- Release the tabs -arrows A- with a screwdriver and remove the trim panel -1- the rear lid lock -arrow B-.
Installing
Install in reverse order of removal. Note the following:
- Press the trim onto the rear lid lock until it engages audibly.