Audi Q5: Overview - Final Drive
Audi Q5 Type 8R (2008 - 2017) Service Manual / Transmission / Real Final Drive, Differential / Final Drive / Overview - Final Drive
Overview - Final Drive 0BC, 0BD
Rear Final Drive
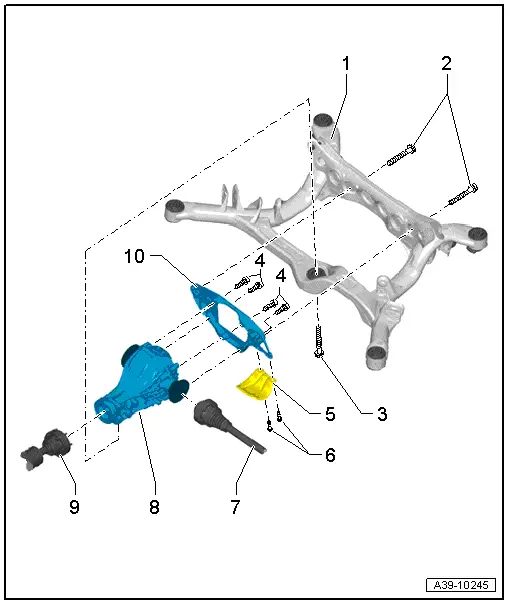
1 - Subframe
- Removing and installing. Refer to → Suspension, Wheels, Steering; Rep. Gr.42; Subframe; Overview - Subframe.
2 - Bolt
- 95 Nm
3 - Bolt
- 55 Nm
4 - Bolt
- 55 Nm
- Depending on the date of manufacture for the balance weight fastener.
5 - Heat Shield
6 - Bolt
- 20 Nm
7 - Drive Axle
- Removing and installing. Refer to → Suspension, Wheels, Steering; Rep. Gr.42; Drive Axle; Drive Axle, Removing and Installing.
8 - Rear Final Drive
- Versions with balance weight.
9 - Driveshaft
- Removing and installing. Refer to → Chapter "Driveshaft, Removing and Installing".
- Removing and installing on the rear final drive. Refer to → Chapter "Drive Shaft, Removing and Installing from Rear Final Drive".
10 - Crossmember
Balance Weight on the Rear Final Drive
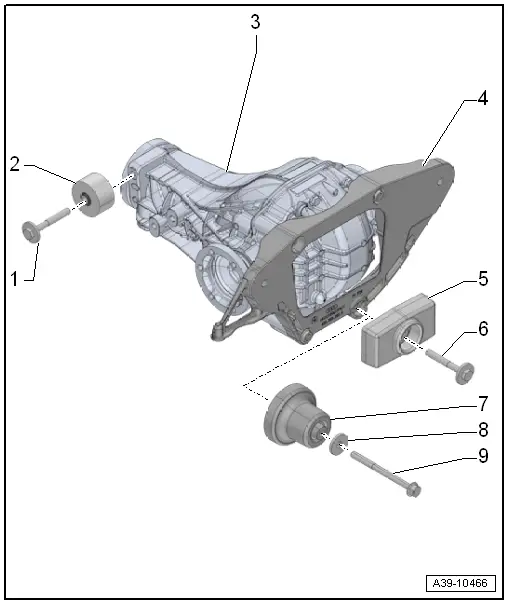
1 - Bolt
- 22 Nm
2 - Balance Weight
- Depending on the date of manufacture; for allocation. Refer to Parts Catalog
3 - Rear Final Drive
4 - Crossmember
5 - Balance Weight
- Depending on the date of manufacture; for allocation. Refer to Parts Catalog
6 - Bolt
- Tightening Specification. Refer to -item 4-.
7 - Balance Weight
- Depending on the vehicle; allocation for Parts Catalog
8 - Washer
9 - Bolt
- Tightening Specification. Refer to -item 4-.
Overview - Final Drive 0BE, 0BF
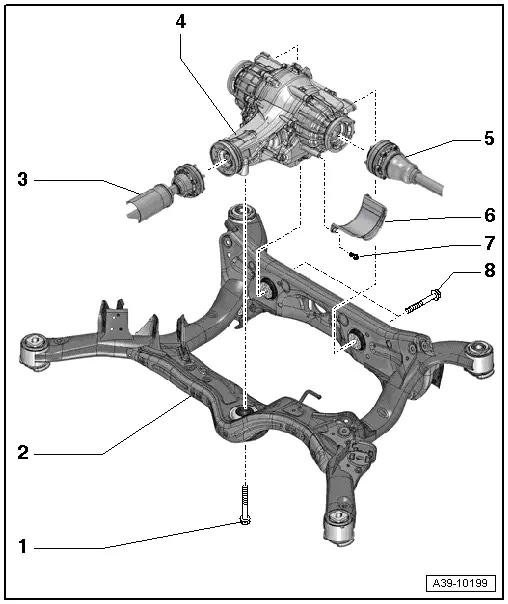
1 - Bolt
- 55 Nm
2 - Subframe
- Overview. Refer to → Suspension, Wheels, Steering; Rep. Gr.42; Subframe; Overview - Subframe.
3 - Driveshaft
- Overview. Refer to → Chapter "Overview - Driveshaft".
- Removing and installing. Refer to → Chapter "Driveshaft, Removing and Installing".
- 4 - Rear Final Drive
- Additional work after replacing the rear final drive. Refer to → Chapter "Additional Work after Replacing Rear Final Drive 0BE, 0BF".
5 - Drive Axle
- Overview. Refer to → Suspension, Wheels, Steering; Rep. Gr.42; Drive Axle; Drive Axle, Removing and Installing.
6 - Heat Shield
7 - Bolt
- 20 Nm
8 - Bolt
- 95 Nm

