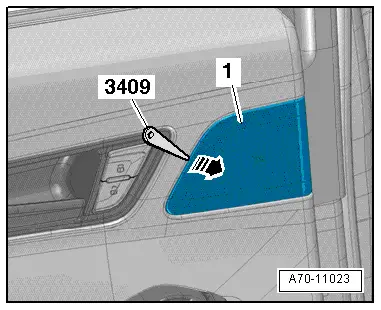
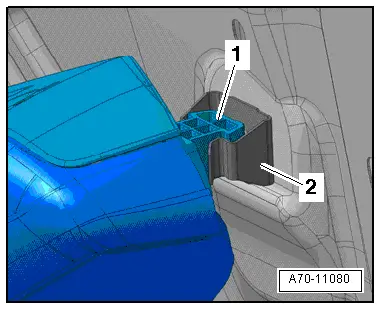
Audi Q5: Treble Speaker Trim, Removing and Installing
Special tools and workshop equipment required
- Trim Removal Wedge -3409-
Removing
- Unclip the treble speaker trim -1- using the Trim Removal Wedge -3409- or a screwdriver -arrow- and remove.
Installing
- Press the trim on until it engages audibly.
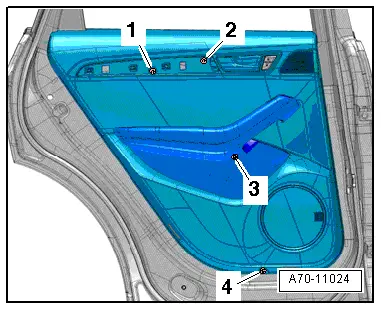
Rear Door Trim Panel, Removing and Installing
Special tools and workshop equipment required
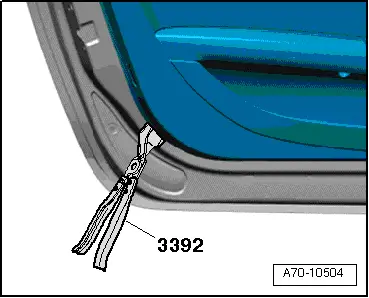
- Door Trim Pliers -3392-
Removing
- Switch the ignition off and remove the ignition key.
- Remove the trim panel. Refer to → Chapter "Trim Molding, Removing and Installing".
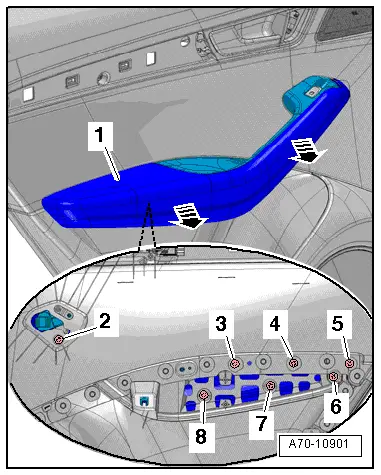
- Remove the bolts -1 to 4-.
- Beginning at the bottom rear curve, unclip the door trim from the door using the Door Trim Pliers -3392- by sliding them between the door trim and the door in the securing clip area.
- Position of the retaining clips -arrows-.
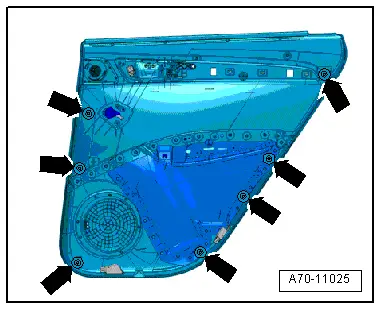
- Pull the door trim panel -1- approximately 15 mm off the door all the way around -arrows A-.
- The clips must not be left in the inside the door.
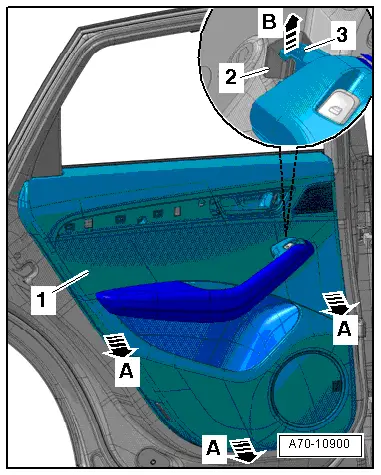
- Remove the pull handle -3- upward and out of the clamp -2- at the indicated point on the door trim panel -arrow B-.
- Disengage and remove the upper door trim panel from the door on the window recess.
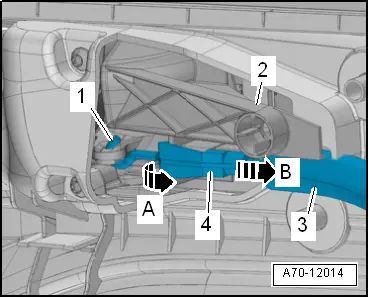
- Unlock the bracket -4- from the cable bracket -2--arrow A-.
- Remove inside door release cable -3- from the control cable bracket in direction of -arrow B-.
- Disengage the ends of the cable -1- from the inside door release mechanism.
- Versions with a treble speaker: Disconnect the treble speaker electrical connector.

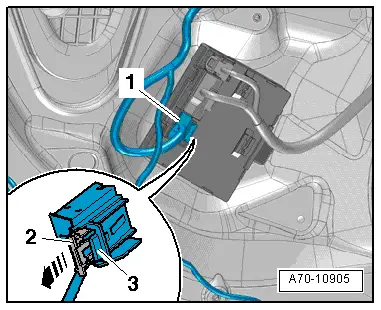
- Disconnect the connector -1- on the door control module by removing the fuse -2--arrow- and pressing the release -3-.
- Remove the door trim.
Installing
- Engage the ends of the cable -1- in the inside door release mechanism lever.
- The open side of the eye on the end of the cable must face up.
- Pull the door mechanism release cable -3- in direction of -arrow B- and guide it into the cable bracket -2-.
- Bracket -4- must engage audibly in the control cable bracket.
- Connect the connectors on the door control module.
- Position the door trim on the window recess and press it down firmly.
- Carefully install the door trim panel clip on the door and then press the door trim panel into the clip so that they audibly engage.
- Install the pull handle -1- into the bracket -2- until it audibly latches into the door.
Install in reverse order of removal.
Rear Armrest, Removing and Installing
Special tools and workshop equipment required
- Trim Removal Wedge -3409-
Removing
- Remove the rear door trim panel. Refer to → Chapter "Rear Door Trim Panel, Removing and Installing".
- Remove the bolts -2 to 8-.
- Loosen the armrest -1- from the pull handle -arrows- with the Trim Removal Wedge -3409- and remove.
Installing
Install in reverse order of removal.
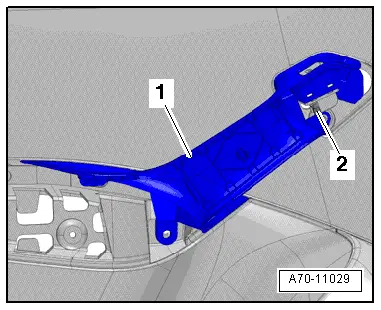
Rear Pull Handle, Removing and Installing
Removing
- Remove the rear door trim panel. Refer to → Chapter "Rear Door Trim Panel, Removing and Installing".
- Remove the rear armrest. Refer to → Chapter "Rear Armrest, Removing and Installing".
- Remove the bolts -1- and -2-.
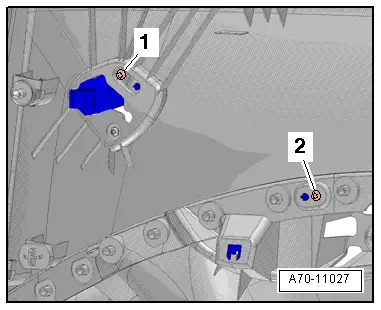
- Remove the pull handle -1- from the door panel.
- Disconnect the connector -2- on the power window switch.
Installing
Install in reverse order of removal.