Audi Q5: Instrument Panel Side Cover, Removing and Installing
Special tools and workshop equipment required
- Trim Removal Wedge -3409-
Removing
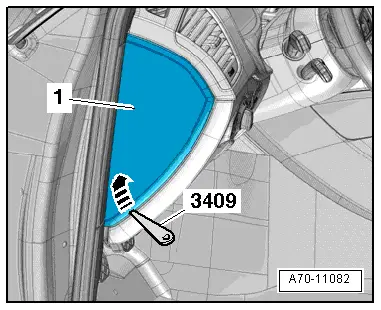
- Pry the instrument panel side cover -1- off using the Trim Removal Wedge -3409--arrow- and remove it.
Installing
- Press the instrument panel side cover on until it engages audibly.
Instrument Panel Decorative Trim, Removing and Installing
Special tools and workshop equipment required
- Trim Removal Wedge -3409-
Removing
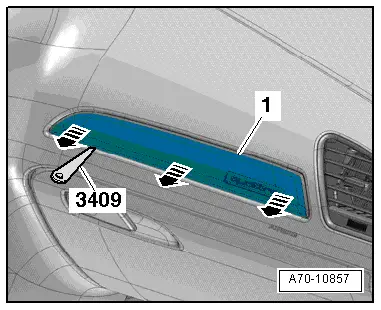
- Pry the instrument panel trim -1- off using the Trim Removal Wedge -3409--arrow- and remove it.
Installing
- Press the instrument panel trim until it engages audibly.
MMI Screen Cover, Removing and Installing
Special tools and workshop equipment required
- Trim Removal Wedge -3409-
Removing
- Pry the MMI screen cover -1- out at the corners -arrow- using the Trim Removal Wedge -3409- and remove it.
- Disconnect the Front Passenger Airbag -Disabled- Indicator Lamp -K145-/Emergency Flasher Button -E229- connector and remove the cover.
Installing
Install in reverse order of removal. Note the following:
 Note
Note
Check the clips for damage or deformation and replace them if necessary.
- Press the MMI screen cover on until it engages audibly.

Speaker Trim, Removing and Installing
Speaker Trim, Removing and Installing, Side Speaker Trim
 Note
Note
Be extremely careful when removing and installing because it is easy to damage the speaker trim.
Removing
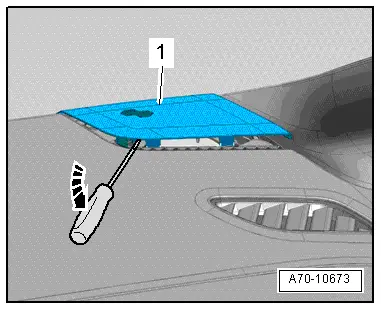
- Using a small screwdriver, carefully pry the speaker trim -1- out beginning at the corner -arrow-.
- Fold the speaker trim upward and remove it.
Installing
- First insert the speaker trim in the instrument panel and then press it on until it engages audibly.
Speaker Trim, Removing and Installing, Center Speaker
Special tools and workshop equipment required
- Trim Removal Wedge -3409-
Removing
 Note
Note
Be extremely careful when removing and installing because it is easy to damage the speaker trim.
- Carefully detach the speaker -1- on the rear pins in the driver direction -arrow- using the Trim Removal Wedge -3409-.
- Lift the rear speaker trim slightly, disengage it at the front on the defroster vent and remove it toward the rear.
Installing
- First insert the speaker trim in the instrument panel and then press it on until it engages audibly.


