Audi Q5: Front Emblem, Removing and Installing
Front Emblems, Removing and Installing, Brand Emblems
Removing
- Remove the reinforcement brace, refer to → Chapter "Reinforcement Brace, Removing and Installing".
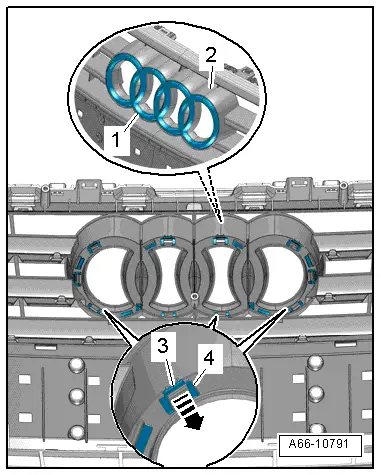
- Lift the tab -4- in direction of -arrow- and unlock the tabs -3-.
- Remove the Audi rings -1- from the radiator grille -2-.
Installing
Install in reverse order of removal. Note the following:
- Press on the Audi rings until you hear them click into place.
- Install the reinforcement brace, refer to → Chapter "Reinforcement Brace, Removing and Installing".
Front Emblems, Removing and Installing, quattro Name Badge
Removing
- Remove the lock carrier cover. Refer to → Chapter "Lock Carrier Cover, Removing and Installing".
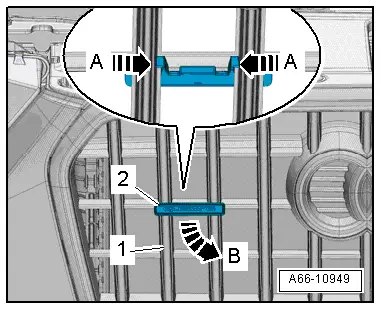
- Release the tabs -A arrows-.
- Turn the quattro name badge -2- counter-clockwise -arrow B- and remove it from the radiator grille -1-.
Installing
Install in reverse order of removal. Note the following:
- Position the quattro name badge on the radiator grille and press it on until it engages audibly.
- Install the lock carrier cover. Refer to → Chapter "Lock Carrier Cover, Removing and Installing".
Front Emblems, Removing and Installing, SQ5 Name Badge
Removing
- Remove the lock carrier cover. Refer to → Chapter "Lock Carrier Cover, Removing and Installing".
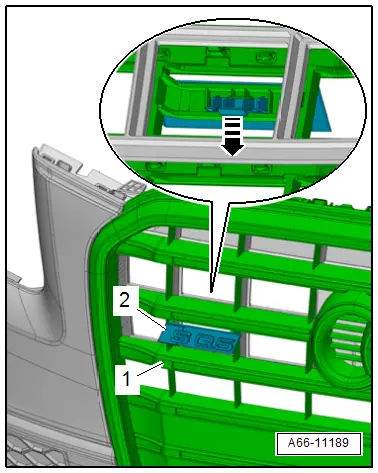
- Release the retainer -arrow-.
- Remove the SQ5 name badge -2- from the radiator grille -1-.
Installing
Install in reverse order of removal. Note the following:
- Position the SQ5 name badge on the radiator grille and press it on until it engages audibly.
Name Badges, Removing and Installing
Special tools and workshop equipment required
- Roller -3356-
 Caution
- Badges and emblems that are remove must be replaced.
- The vehicle must reach room temperature before installing the name badge and emblems.
- The adhesive surface on the body must be free of dirt and grease, as well as free of adhesive residue.
- Clean the adhesive surfaces using Cleaning Solution -D 009 401 04-.
- Warm the adhesive surfaces to approximately 40 ºC (104 ºF) using a hot air blower.
- After installing, take the roller and press the brand emblems one more time.

