Audi Q5: Noise Insulation
Overview - Noise Insulation
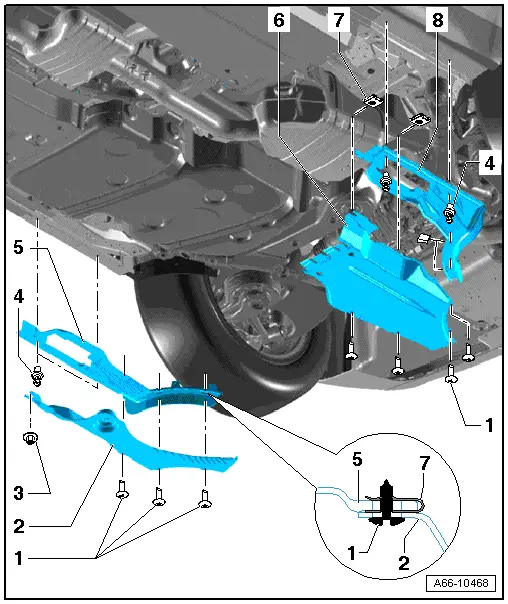
Front Noise Insulation
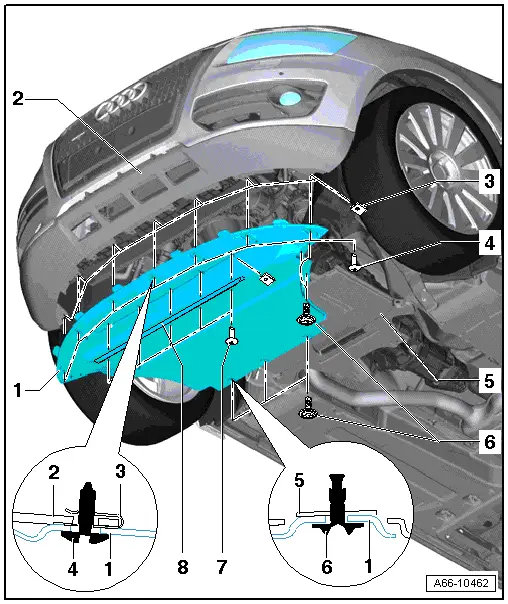
1 - Noise Insulation
- Removing:
- The front wheel spoiler is removed. Refer to → Chapter "Overview - Front Wheel Spoiler".
- Remove the bolts -1- and -2- as well as the bolts at the bottom of the wheel housing liner (3 bolts on each side) and then pull the noise insulation toward the rear under the bumper.
- When installing, slide the front noise insulation in under the bumper.
2 - Bumper Cover
3 - Spring Nut
- Install on the bumper cover.
4 - Bolt
- 2.5 Nm
5 - Rear Noise Insulation
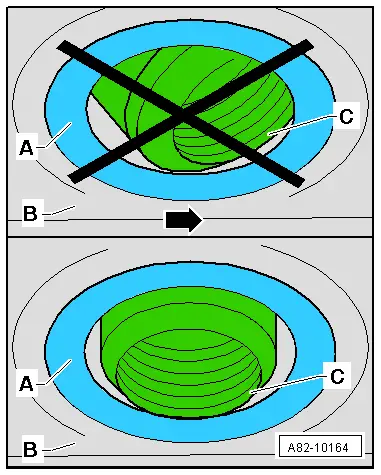
6 - Quick Release
- Rotate 180º to the left to remove.
- When installing, the connection must engage when rotating.
7 - Bolt
- 2.5 Nm
8 - Spoiler
Vehicles with Parking Heater
- In vehicles with a parking heater, make sure the exhaust pipe is installed correctly in the noise insulation.
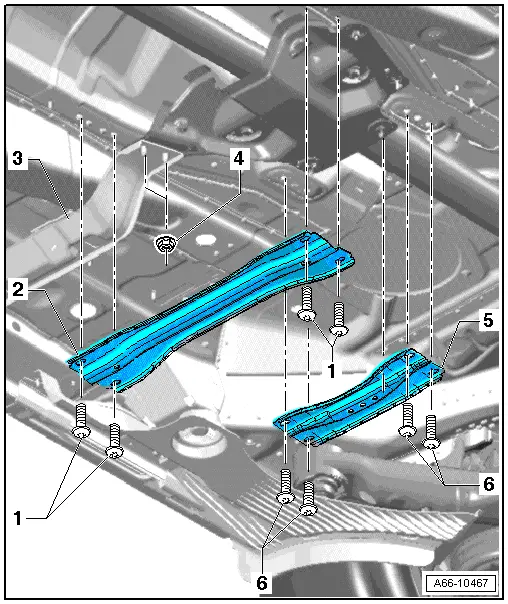
Rear Noise Insulation
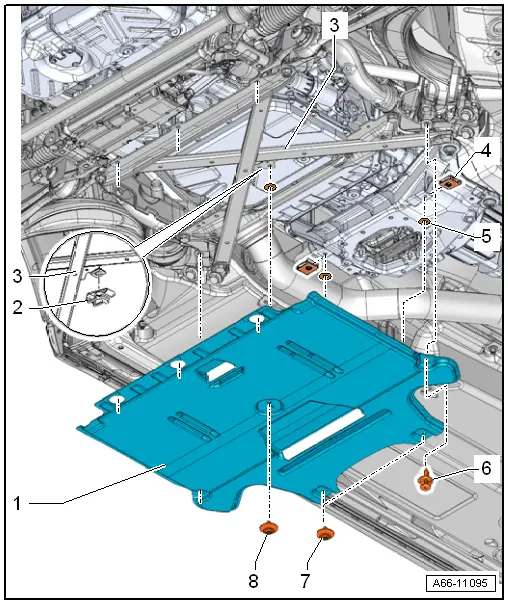
1 - Rear Noise Insulation
- Loosen the 3 rear quick-release fasteners on the noise insulation.
- Loosen the quick-release fasteners -6- and remove the noise insulation toward the rear.
2 - Spring Nut
- Slide into the crossbrace.
3 - Crossbrace
4 - Spring Nut
- Slide sideways into the transmission crossmember.
5 - Washer
6 - Expanding Clip
- Quantity: 2
7 - Bolt
- Quantity: 2
- 2.5 Nm
8 - Bolt
- 2.5 Nm
Noise Insulation, Removing and Installing
Refer to the Assembly Overview to determine removal and installation, refer to → Chapter "Overview - Noise Insulation".
Underbody Panel
Overview - Underbody Panels
Front Underbody Panels
1 - Right Aerodynamic Trim Panel
2 - Expanding Clip
3 - Nut
- 2 Nm
4 - Expanding Clip
5 - Right Front Aerodynamic Trim Panel
6 - Left Front Aerodynamic Trim Panel
7 - Left Aerodynamic Trim Panel
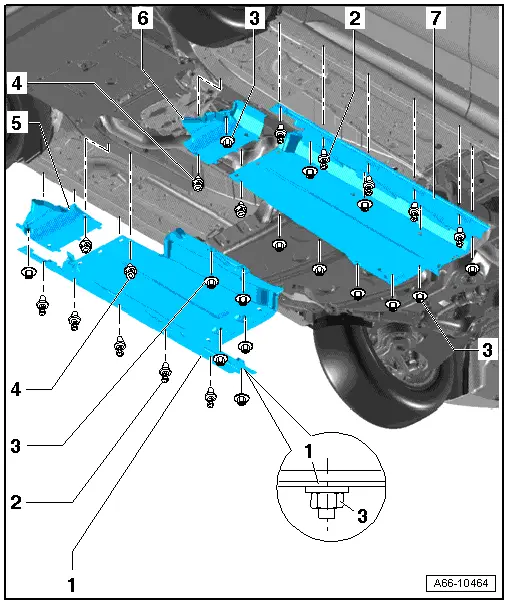
Rear Underbody Panels
1 - Bolt
- 2 Nm
2 - Right Rear Aerodynamic Trim Panel
- Slide under the right aerodynamic trim panel when installing.
3 - Nut
- 2 Nm
4 - Clip
- 3 Nm
5 - Rear Right Longitudinal Member Trim
6 - Aerodynamic Trim Left Rear
7 - Spring Nut
8 - Rear Left Longitudinal Member Trim
Overview - Tunnel Brace
1 - Bolt
- 55 Nm
2 - Front Crossmember
3 - Brace
4 - Nut
- 20 Nm
5 - Rear Cross Member
6 - Bolts
- 55 Nm

